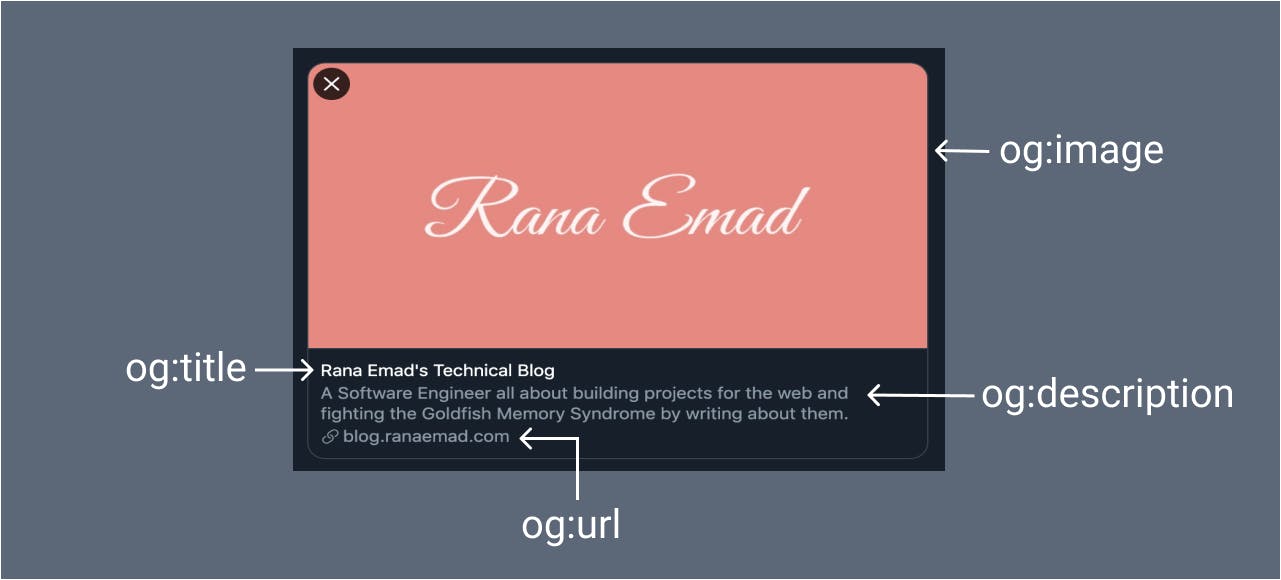
We all want our websites to be shared on Twitter, Facebook and all the different channels of social media. Whether they are our own websites that have our blogs and profiles or websites we built for other people. We all value those valuable clicks, so as a means of seduction to make our links clickable, we need to make them look attractive and pretty.
Instead of just sharing a bare link that doesn't give us enough indication of what the page content is about, we can turn it into a beautiful card that represents the content on each page of our website.
Open Graph
Years ago, Facebook granted us Open Graph to turn our links into lovely rich graph object that can be shared easily and beautifully. Open Graph uses meta tags to communicate with our website and grab the desired information we want displayed in our cards. You can know more about it on the Open Graph Protocol website.
They are also not only available for Facebook, they are widely used and are available for Twitter, LinkedIn, Pinterest and many more social media platforms.
Meta Tags
In order to build our cards, we have to pass our desired data through meta tags. We have lots of meta tags and you can find them all HERE, but if we're going to talk about the basic meta tags that are capable of making our card look good, then we have to mention the following 4 required tags:
og:titleYour title of choice
og:typeWhether it is a website or a video or an audio, ...etc.
og:imageThe image you would like to display on your card and we're going to talk later about its dimensions and best practices
og:urlThe URL you want displayed in the card

Where?
Once we open our head tag in our HTML structure, we can include all the meta tags we want.
<head>
    <meta property="og:title" content="I am a title" />
    <meta property="og:type" content="website" />
    <meta property="og:url" content="IamAUrl.yes" />
    <meta property="og:image" content="imageURL.cool" />
</head>
Card Image Best Practices
Choosing an image should depend on the page content itself. Each card image should represent each page and should not be something generic for all the website pages. If it's a blog post, we can add the cover image of the post, if it's an e-commerce item, we can add the image of the item and so on.
Recommended Size
- The perfect fit: 1200x628
- Minimum allowed dimensions 200x200
- Maximum size 8MB
If the image is smaller than 600x315, it will not be displayed as a large full width image. It will be displayed in smaller size on the side.
You can find out more in Facebook's official docs
- The perfect fit is not specified officially, but after some googling 1200x628 would work fine for a large summary card, as well
- Minimum allowed dimensions: 300x157
- Maximum allowed dimensions: 4096x4096
- Maximum size: 5MB
Twitter has its own meta tags for further customization. You can find all the information you need about them in the official Twitter docs.
To use any of these tags, there are 2 required tags to be added:
twitter:titletwitter:card
What I am going to highlight is the twitter:card meta tag. There are 2 views to choose from for your card and they depend on the value you give to that tag.
You can set it to either:
summary
<meta name="twitter:card" content="summary">
summary_large_image
<meta name="twitter:card" content="summary_large_image">
- The perfect fit: 1200x627
- Minimum allowed width: 200px
How do I know it works?
Social media websites will not leave us clueless on this one. Each website provides a tool we can use to view our progress and validate our cards with no surprises.
Now we have all what we need to make our websites look superb on social media!
Ping me @R_anaEm with your favorite website cards and show off your own!

