


We have been using React to develop Single Page Applications, so far and it's not that we don't like SPAs, we love them, but we tend to get involved in more complex applications that require multiple pages, don't we? So we need to be prepared if we have multiple pages, we will need to jump gracefully from one route to another and to jump gracefully from one route to another, we will need, guess what?
React Router
Our mission this time is a breeze. We are going to explore the react-router-dom package which works like charm with our create-react-app, so that saves us a lot of pain.
We will practice four basic components provided in react-router-dom:
BrowserRouter
We need to encapsulate our top level or root element in this component to be able to specify our different routes. Usually, since I always use the App component as my start point in the application, it would be a good place for it.
Switch
Just like any other switch statement you met in your journey as a coder, it helps us compare multiple choices and tell us who the winner is and we use it to match the current URL against the routes we specified.
Route
Our Switch needs those choices to be Route components and that's the component where we can specify our path of choice and associate it with its corresponding component.
Link
We use this to replace our usual anchor tag, when we are actually directing to a specific path and it takes care of everything under the hood and creates the anchor tag for us.
Words don't really do the React Router functionality justice, but building web apps does!
Build What?
We all need some visual inspiration from time to time and since the pandemic we have been spending more time inside than outside, so I decided to bring a little outside inside in this web app.
We are going to build an inspiration fetcher for our bored eyes. It is going to fetch us some random images from unsplash.com via API to have ourselves the necessary eye candy to get us through the day.
Get your Inspiration Of The Day HERE

What's The Plan?
We want to have three main pages:
Home page
Where we display the random images we fetched
Single Image page
A page that displays any clicked image from the Home page, enlarged, along with the name of the photographer who took it.
Photographer page
A page to display the photographer's basic information and show off his latest work, when his name is clicked in the Single Image page.
Great! We have our pages. We only need one more component, since we noticed that both the Home and the Photographer pages would need to display an images grid, let's call it Images!
To codeland!
Home
After the installation and initialization of create-react-app, let us start by creating our first page, the Home.
We plan on fetching some random images from unsplash.com and then display them in a grid.
To use the API we will need a free app key. It's a simple process and you can know more about it from the Unsplash official docs.
For our project structure, this time, we have a new addition, pages. We will be separating pages from components. They will remain both normal React components, but the difference will be in the place they're stored. We want to keep ourselves organized and avoid any possible confusion of what goes where.
For our pages, we are going to create a folder structure similar to our components folder structure. We are going to start by creating a pages folder in the src folder, then a Home folder and inside it goes our Home.js and Home.css
In our Home.js we will communicate with the API endpoint and fetch 12 random images in componentDidMount as we are used to and set the response we get, in a state called images.
import React from "react";
import "./Home.css";

class Home extends React.Component {
  constructor() {
    super();
    this.state = {
      images: [],
    };
  }
  componentDidMount() {
    fetch("https://api.unsplash.com/photos/random?count=12", {
      headers: {
        Authorization: `Client-ID YourApiKey`,
      },
    })
      .then((response) => response.json())
      .then((data) => {
        this.setState({
          images: data,
        });
      })
      .catch((error) => console.error(error));
  }
  render() {
    return
        (<div className="home">
            <h1 className="header">Inspiration Of The Day</h1>
         </div>);
  }
}

export default Home;
Now we need to create the Images component we agreed upon to have our page complete, but first, let's include our Home page in our App.js file to display the changes as we go!
import React from "react";
import "./App.css";
import Home from "./pages/Home/Home";

class App extends React.Component {
  render() {
      return (
        <div className="app">
          <Home />
        </div>
      );
    }
}

export default App;
Images
After creating our components folder in our src folder and including an Images folder in it, we can now fill our Images.js and Image.css files to display our inspirational images.
We will have a simple grid of the images and we plan on having those images passed to us as an array in a prop.
import React from "react";
import "./Images.css";

class Images extends React.Component {
  render() {
    return (
      <div className="images">
        {this.props.images.map((data) => (
          <img key={data.id} alt={data.description} className="image" src={data.urls.small} />
        ))}
      </div>
    );
  }
}

export default Images;
Nice! Now, let's include our Images component in our Home page and pass those images as a prop!
render() {
    return (
      <div className="home">
        <h1 className="header">Inspiration Of The Day</h1>
        <Images images={this.state.images} />
      </div>
    );
  }
Looking good! But it will look even better if we throw some CSS here and there
Images.css
.images {
  display: grid;
  grid-template-columns: repeat(auto-fill, minmax(250px, 1fr));
  grid-gap: 2rem;
  padding: 0 5% 5% 5%;
  align-items: stretch;
}

.images .image {
  width: 100%;
  height: 100%;
  max-height:350px;
  border: teal 10px solid;
}

.image img{
    width: 100%;
    height: 100%;
}
App.css
@import url('https://fonts.googleapis.com/css2?family=Pacifico&display=swap');
* {
  box-sizing: border-box;
}

html,
body,
#root,
.app {
  height: 100%;
}

body {
  background-color: #ff5c5c;
  background-image: url("data:image/svg+xml,%3Csvg xmlns='http://www.w3.org/2000/svg' width='100%25' height='100%25' viewBox='0 0 1600 800'%3E%3Cg stroke='%23000' stroke-width='65.5' stroke-opacity='0.1' %3E%3Ccircle fill='%23ff5c5c' cx='0' cy='0' r='1800'/%3E%3Ccircle fill='%23f3535d' cx='0' cy='0' r='1700'/%3E%3Ccircle fill='%23e64b5e' cx='0' cy='0' r='1600'/%3E%3Ccircle fill='%23d9435e' cx='0' cy='0' r='1500'/%3E%3Ccircle fill='%23cb3b5d' cx='0' cy='0' r='1400'/%3E%3Ccircle fill='%23be355c' cx='0' cy='0' r='1300'/%3E%3Ccircle fill='%23b02f5a' cx='0' cy='0' r='1200'/%3E%3Ccircle fill='%23a22958' cx='0' cy='0' r='1100'/%3E%3Ccircle fill='%23942455' cx='0' cy='0' r='1000'/%3E%3Ccircle fill='%23862052' cx='0' cy='0' r='900'/%3E%3Ccircle fill='%23781b4e' cx='0' cy='0' r='800'/%3E%3Ccircle fill='%236a1849' cx='0' cy='0' r='700'/%3E%3Ccircle fill='%235d1444' cx='0' cy='0' r='600'/%3E%3Ccircle fill='%2350103e' cx='0' cy='0' r='500'/%3E%3Ccircle fill='%23430d38' cx='0' cy='0' r='400'/%3E%3Ccircle fill='%23370a32' cx='0' cy='0' r='300'/%3E%3Ccircle fill='%232b062b' cx='0' cy='0' r='200'/%3E%3Ccircle fill='%23210024' cx='0' cy='0' r='100'/%3E%3C/g%3E%3C/svg%3E");
  background-attachment: fixed;
  background-size: cover;
  /* background by SVGBackgrounds.com */
  font-family: "Pacifico", cursive;
  color: #c2bcc7;
}
Home.css
.home .header {
  text-align: center;
  font-size: 3rem;
  text-shadow: -11px -1px 5px #210024;
}
Lovely! We have our first page! Now it's time to start working on what this is all about, our router.
We will start in our console by running:
npm install react-router-dom
Now, let's get three out of the four components we mentioned before to work and import them at the beginning of App.js
import { BrowserRouter, Switch, Route } from "react-router-dom";
We need to wrap our app content in a BrowserRouter component as agreed to let our router know where to look. We will also need to create a Switch component that wraps our Route components to add the paths of our multiple routes.
return (
    <BrowserRouter basename={process.env.PUBLIC_URL}>
      <div className="app">
        <Switch>
             <Route path="/" exact component={Home} />
        </Switch>
      </div>
    </BrowserRouter>
  );
Adding the basename will probably make no difference to you on your local environment and your code will work just fine without it, but you'll thank me later when you deploy. The create-react-app takes care of setting the correct absolute path in the PUBLIC_URL env variable, but our react-router-dom would not be aware of that path unless we either prepend that variable to every route path or pass it to the basename in our BrowserRouter component and it will automatically take care of the prepending for us. So if you don't want your URLs all messed up on the server, remember this step.
Now we have another keyword used, exact. When we pass this to our Route component, we tell it to respond to ONLY the specified path with the specified component. If we didn't add that keyword, we can append any number of words or parameters to our path and it will still respond with the Home component.
SingleImage
We have our images in place and we should start creating our SingleImage page to display the clicked image in an enlarged size, but before we do that, we need to adjust our Images component and add to each image the fourth component we mentioned, Link.
We will wrap our img tag with Link and direct that path to single-image. Also, to know which image we are viewing, we are also going to pass along the image id we got from the data we fetched.
import React from "react";
import "./Images.css";
import { Link } from "react-router-dom";

class Images extends React.Component {
  render() {
    return (
      <div className="images">
        {this.props.images.map((data) => (
         <Link key={data.id} to={"/single-image/"+data.id} className="image" > <img alt={data.description} src={data.urls.small} /></Link>
        ))}
      </div>
    );
  }
}

export default Images;
Now, let's add our SingleImage page. We will have just this one enlarged image in our page and a link to the photographer who took it.
We will fetch the image data using the id parameter we passed in our link. We can access the parameters sent in Link components using this.props.match.params.ourParameterName
import React from "react";
import "./SingleImage.css";
import { Link } from "react-router-dom";

class SingleImage extends React.Component {
  constructor(props) {
    super(props);
    this.state = {
      image: {},
    };
  }
  componentDidMount() {
    fetch("https://api.unsplash.com/photos/" + this.props.match.params.id, {
      headers: {
        Authorization: `Client-ID ${process.env.REACT_APP_API_KEY}`,
      },
    })
      .then((response) => response.json())
      .then((data) => {
        this.setState({
          image: data,
        });
      })
      .catch((error) => console.error(error));
  }
  render() {
    if (this.state.image.user && this.state.image.urls) {
      return (
        <div className="single-image">
          <figure>
            <img
              alt={this.state.image.description}
              src={this.state.image.urls.full}
            />
            <figcaption>
              Photographed By{" "}
              <span className="image-photographer">
                <Link to={"/photographer/" + this.state.image.user.id}>
                  {this.state.image.user.name}
                </Link>
              </span>
            </figcaption>
          </figure>
        </div>
      );
    }
    return "";
  }
}

export default SingleImage;
I faced a problem where sometimes the nested objects where undefined, so I added an if condition to only render when we have all of our data ready. I also added a Link component to the photographer, the same way we did with image.
To see everything clearly, let's add our CSS in SingleImage.css, before moving on to the photographer's page!
.single-image {
  display: flex;
  justify-content: center;
  align-items: center;
  height: 100%;
}

.single-image figure {
  height: 100%;
  width: 100%;
  display: flex;
  justify-content: center;
  flex-direction: column;
  align-items: center;
}

.single-image figcaption,
.single-image figcaption .image-photographer {
  text-align: center;
  color: #c2bcc7;
  font-family: "Pacifico", cursive;
}
.single-image figcaption {
  font-size: 2rem;
  text-shadow: -11px -1px 5px #210024;
}

.single-image figcaption .image-photographer {
  text-shadow: none;
  font-size: 3rem;
}
.single-image figcaption .image-photographer a {
  color: #c2bcc7;
}

.single-image figure img {
  width: 70%;
  height: 80%;
}
Purrrfect! We can officially add the path to our Switch component in the App.js file!
render() {
    return (
      <BrowserRouter>
        <div className="app">
          <Switch>
            <Route path="/single-image/:id" component={SingleImage} />
            <Route path="/" exact component={Home} />
          </Switch>
        </div>
      </BrowserRouter>
    );
  }
Annnnd it's working!
Photographer
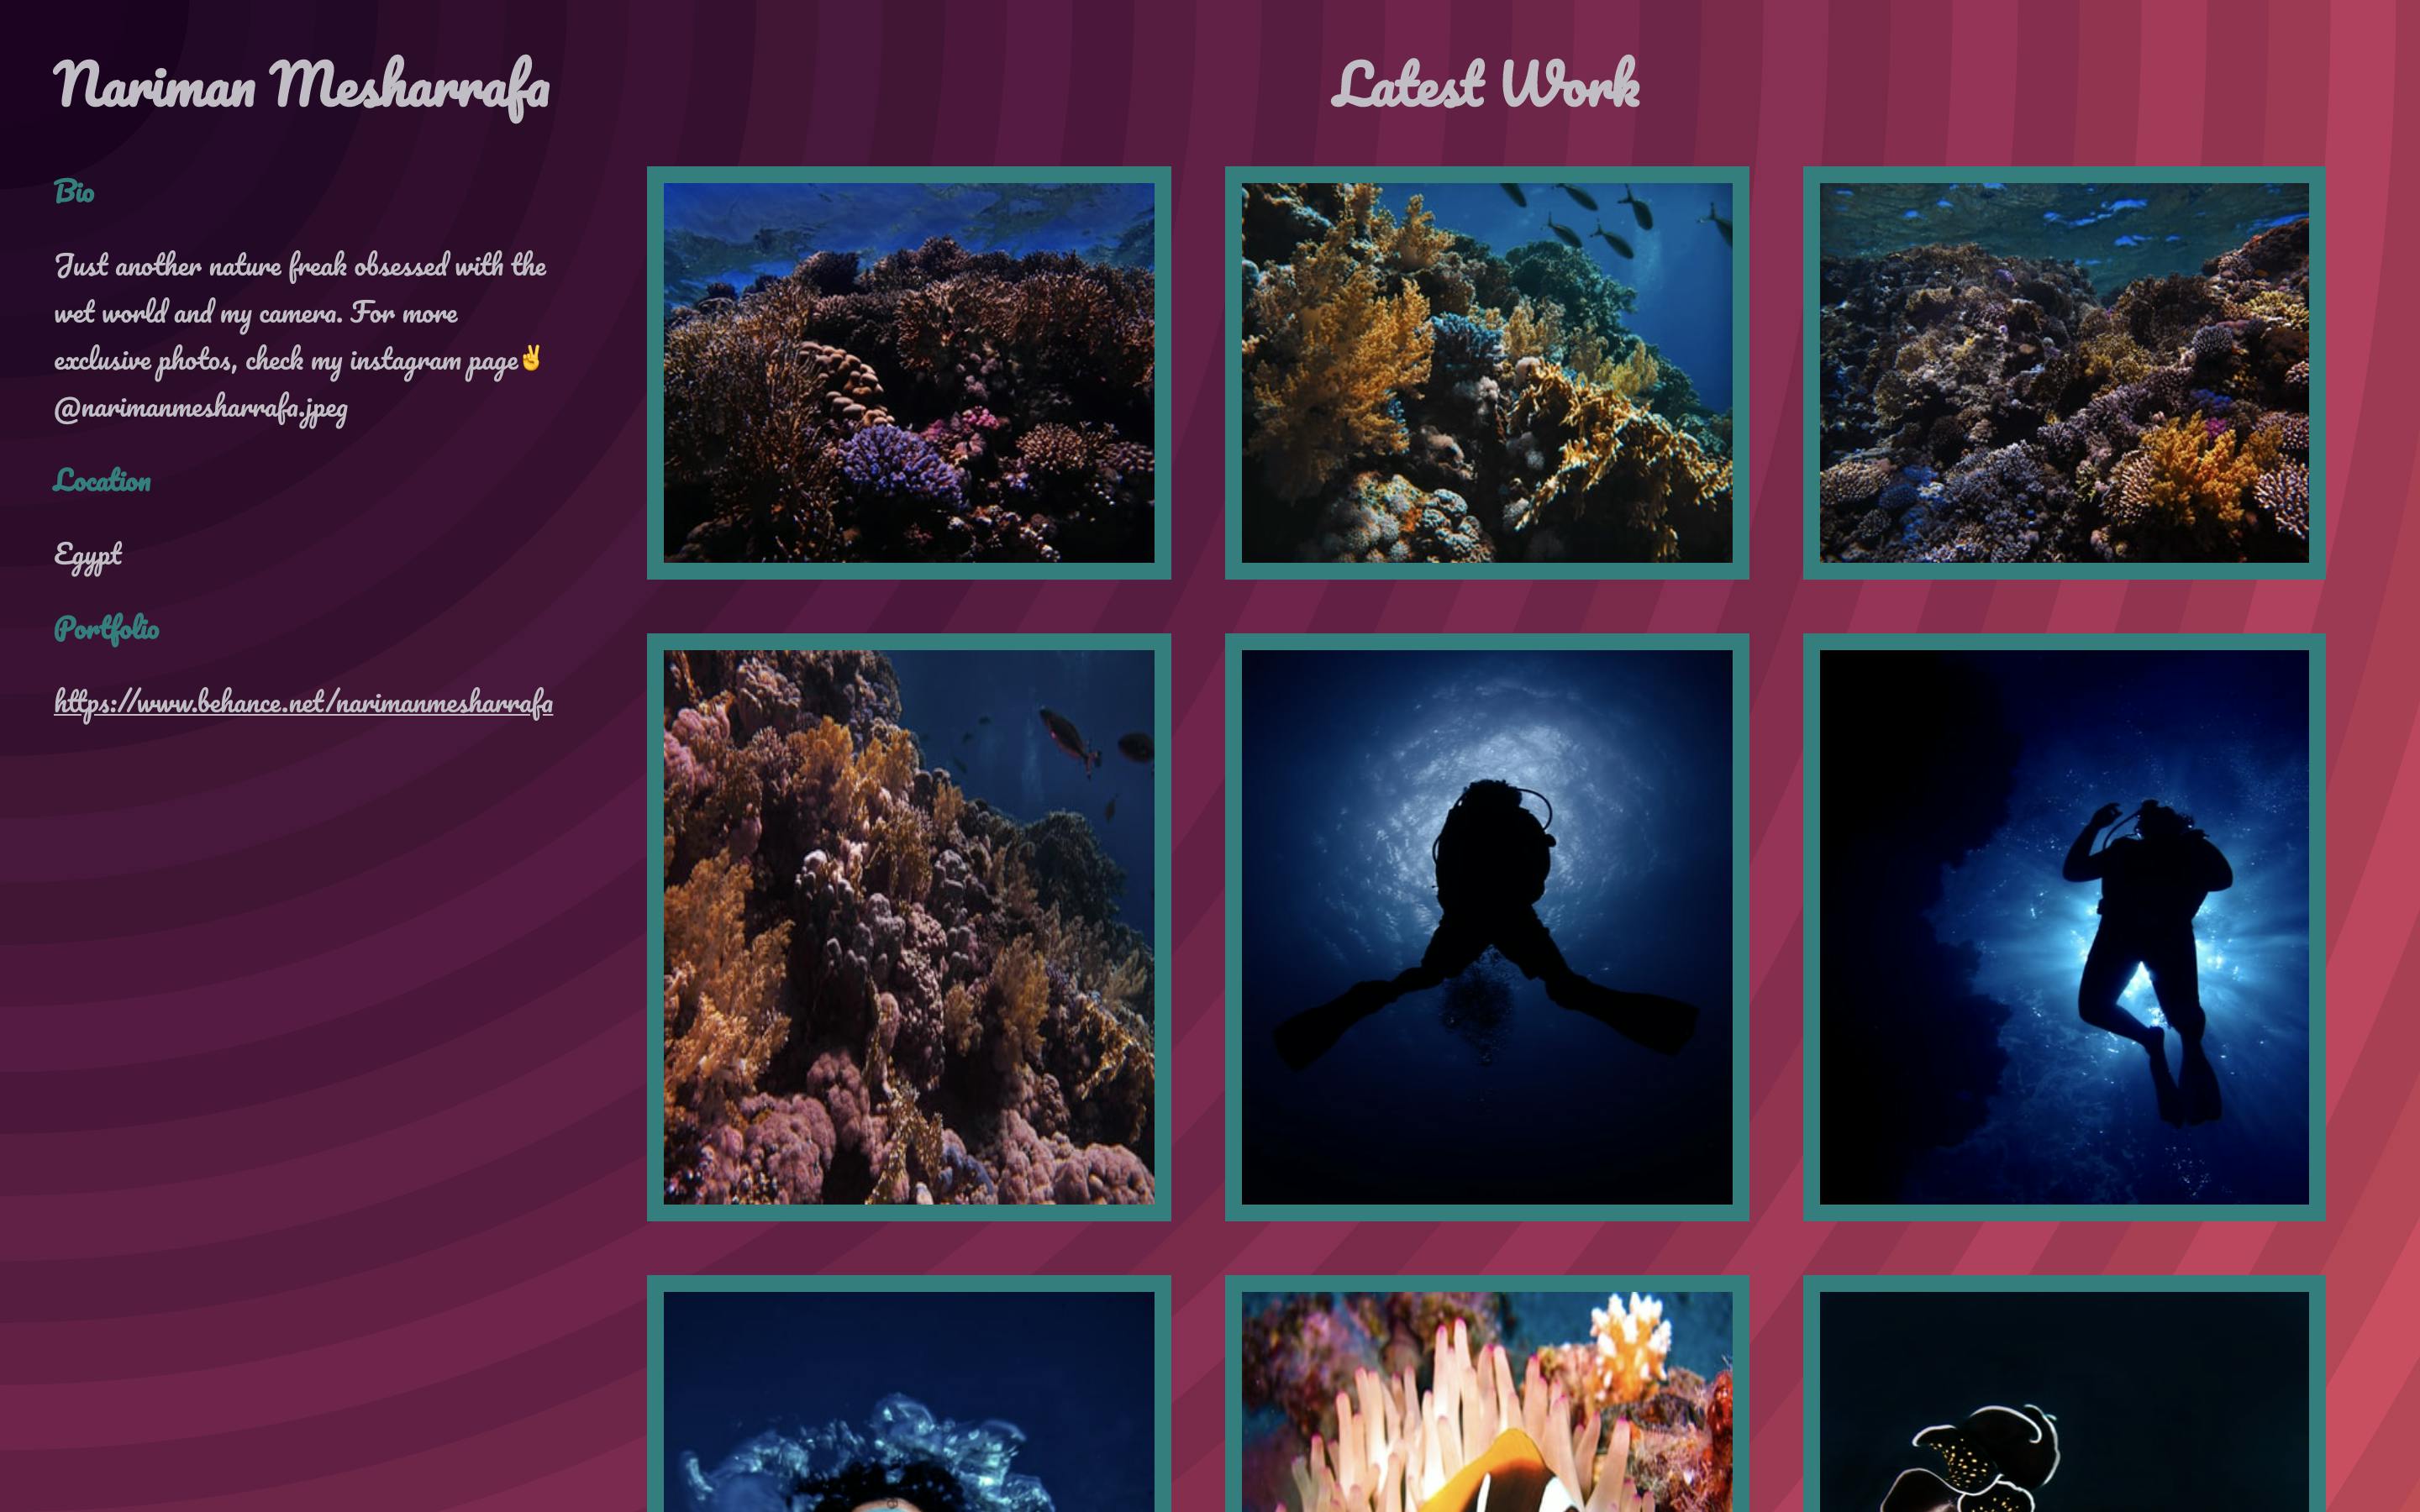
For our Photographer page, we need to fetch two different sorts of data, the photographer's basic information and the photographer's latest photos.
In our componentDidMount we will call the two endpoints that enable us to do so and update our states with the resulting data.
import React from "react";
import "./Photographer.css";
import Images from "../../components/Images/Images";

class Photographer extends React.Component {
  constructor(props) {
    super(props);
    this.state = {
      user: {},
      images: [],
    };
  }
  componentDidMount() {
    fetch(
      "https://api.unsplash.com/users/" + this.props.match.params.username,
      {
        headers: {
          Authorization: `Client-ID ${process.env.REACT_APP_API_KEY}`,
        },
      }
    )
      .then((response) => response.json())
      .then((data) => {
        console.log(data);
        this.setState({
          user: data,
        });
      })
      .catch((error) => console.error(error));

    fetch(
      "https://api.unsplash.com/users/" +
        this.props.match.params.username +
        "/photos?order_by=latest",
      {
        headers: {
          Authorization: `Client-ID ${process.env.REACT_APP_API_KEY}`,
        },
      }
    )
      .then((response) => response.json())
      .then((data) => {
        console.log(data);
        this.setState({
          images: data,
        });
      })
      .catch((error) => console.error(error));
  }
  render() {
    return (
      <div className="photographer">
        <div className="info">
          <h1 className="header">{this.state.user.name}</h1>
          <div className="info-block">
            <p className="header">Bio</p>
            <p>{this.state.user.bio}</p>
          </div>
          <div className="info-block">
            <p className="header">Location</p>
            <p>{this.state.user.location}</p>
          </div>
          <div className="info-block">
            <p className="header">Portfolio</p>
            <p><a href={this.state.user.portfolio_url}>{this.state.user.portfolio_url}</a></p>
          </div>
        </div>
        <div className="photographer-images">
          <h1 className="header"> Latest Work</h1>
          <Images images={this.state.images} />
        </div>
      </div>
    );
  }
}

export default Photographer;
Working well, but CSS is needed in Photographer.css
.photographer {
  display: grid;
  grid-template-columns: 2fr 8fr;
}

.photographer .info {
  margin-left: 2rem;
}

.info .info-block .header {
  font-weight: 900;
  color: teal;
}

.info .info-block a {
  color: #c2bcc7;
}

.photographer .photographer-images .header {
  text-align: center;
}
We're done! We have our inspiration of the day and every day!
The code can be found HERE
By this mini inspiration, I shall end my sixth baby step towards React greatness, until we meet in another one.
Any feedback or advice is always welcome. Reach out to me here, on Twitter, there and everywhere!